
Can you make cold brew coffee with Aeropress?
The answer is definitely yes!
Aeropress is very suitable for brewing cold brew due to its ease of use and practicality.
The most important advantage of brewing cold brew in an Aeropress is the time saved during filtration. It’s hard to filter cold brew coffee through a Hario V60 because the paper filter clogs quickly.
However, with the Aeropress, pressure is created with the plunger, allowing you to filter the coffee in less than a minute.
The volume of the Aeropress is ideal for brewing a mug of cold brew at a time. For larger brews, we have to wait for larger versions of the Aeropress 😊.
On the other hand, cold brew is known for its long brewing times (12-24 hours). But this time can be reduced to a few minutes in the Aeropress.
Initially, I didn’t think it was possible, but I was surprised after trying it. It definitely works!
In this article from Best Coffee at Home, we will look at how to brew cold brew in an Aeropress. We will also give two cold brew recipes, one old school and one fast, and discuss their differences.
Grab your Aeropress and keep reading!

Old School Aeropress Cold Brew
This method is the original cold brew recipe. This method is ideal if you have plenty of time (12-24 hours) and want to drink a strong cold brew.
Related: Cold Brew History
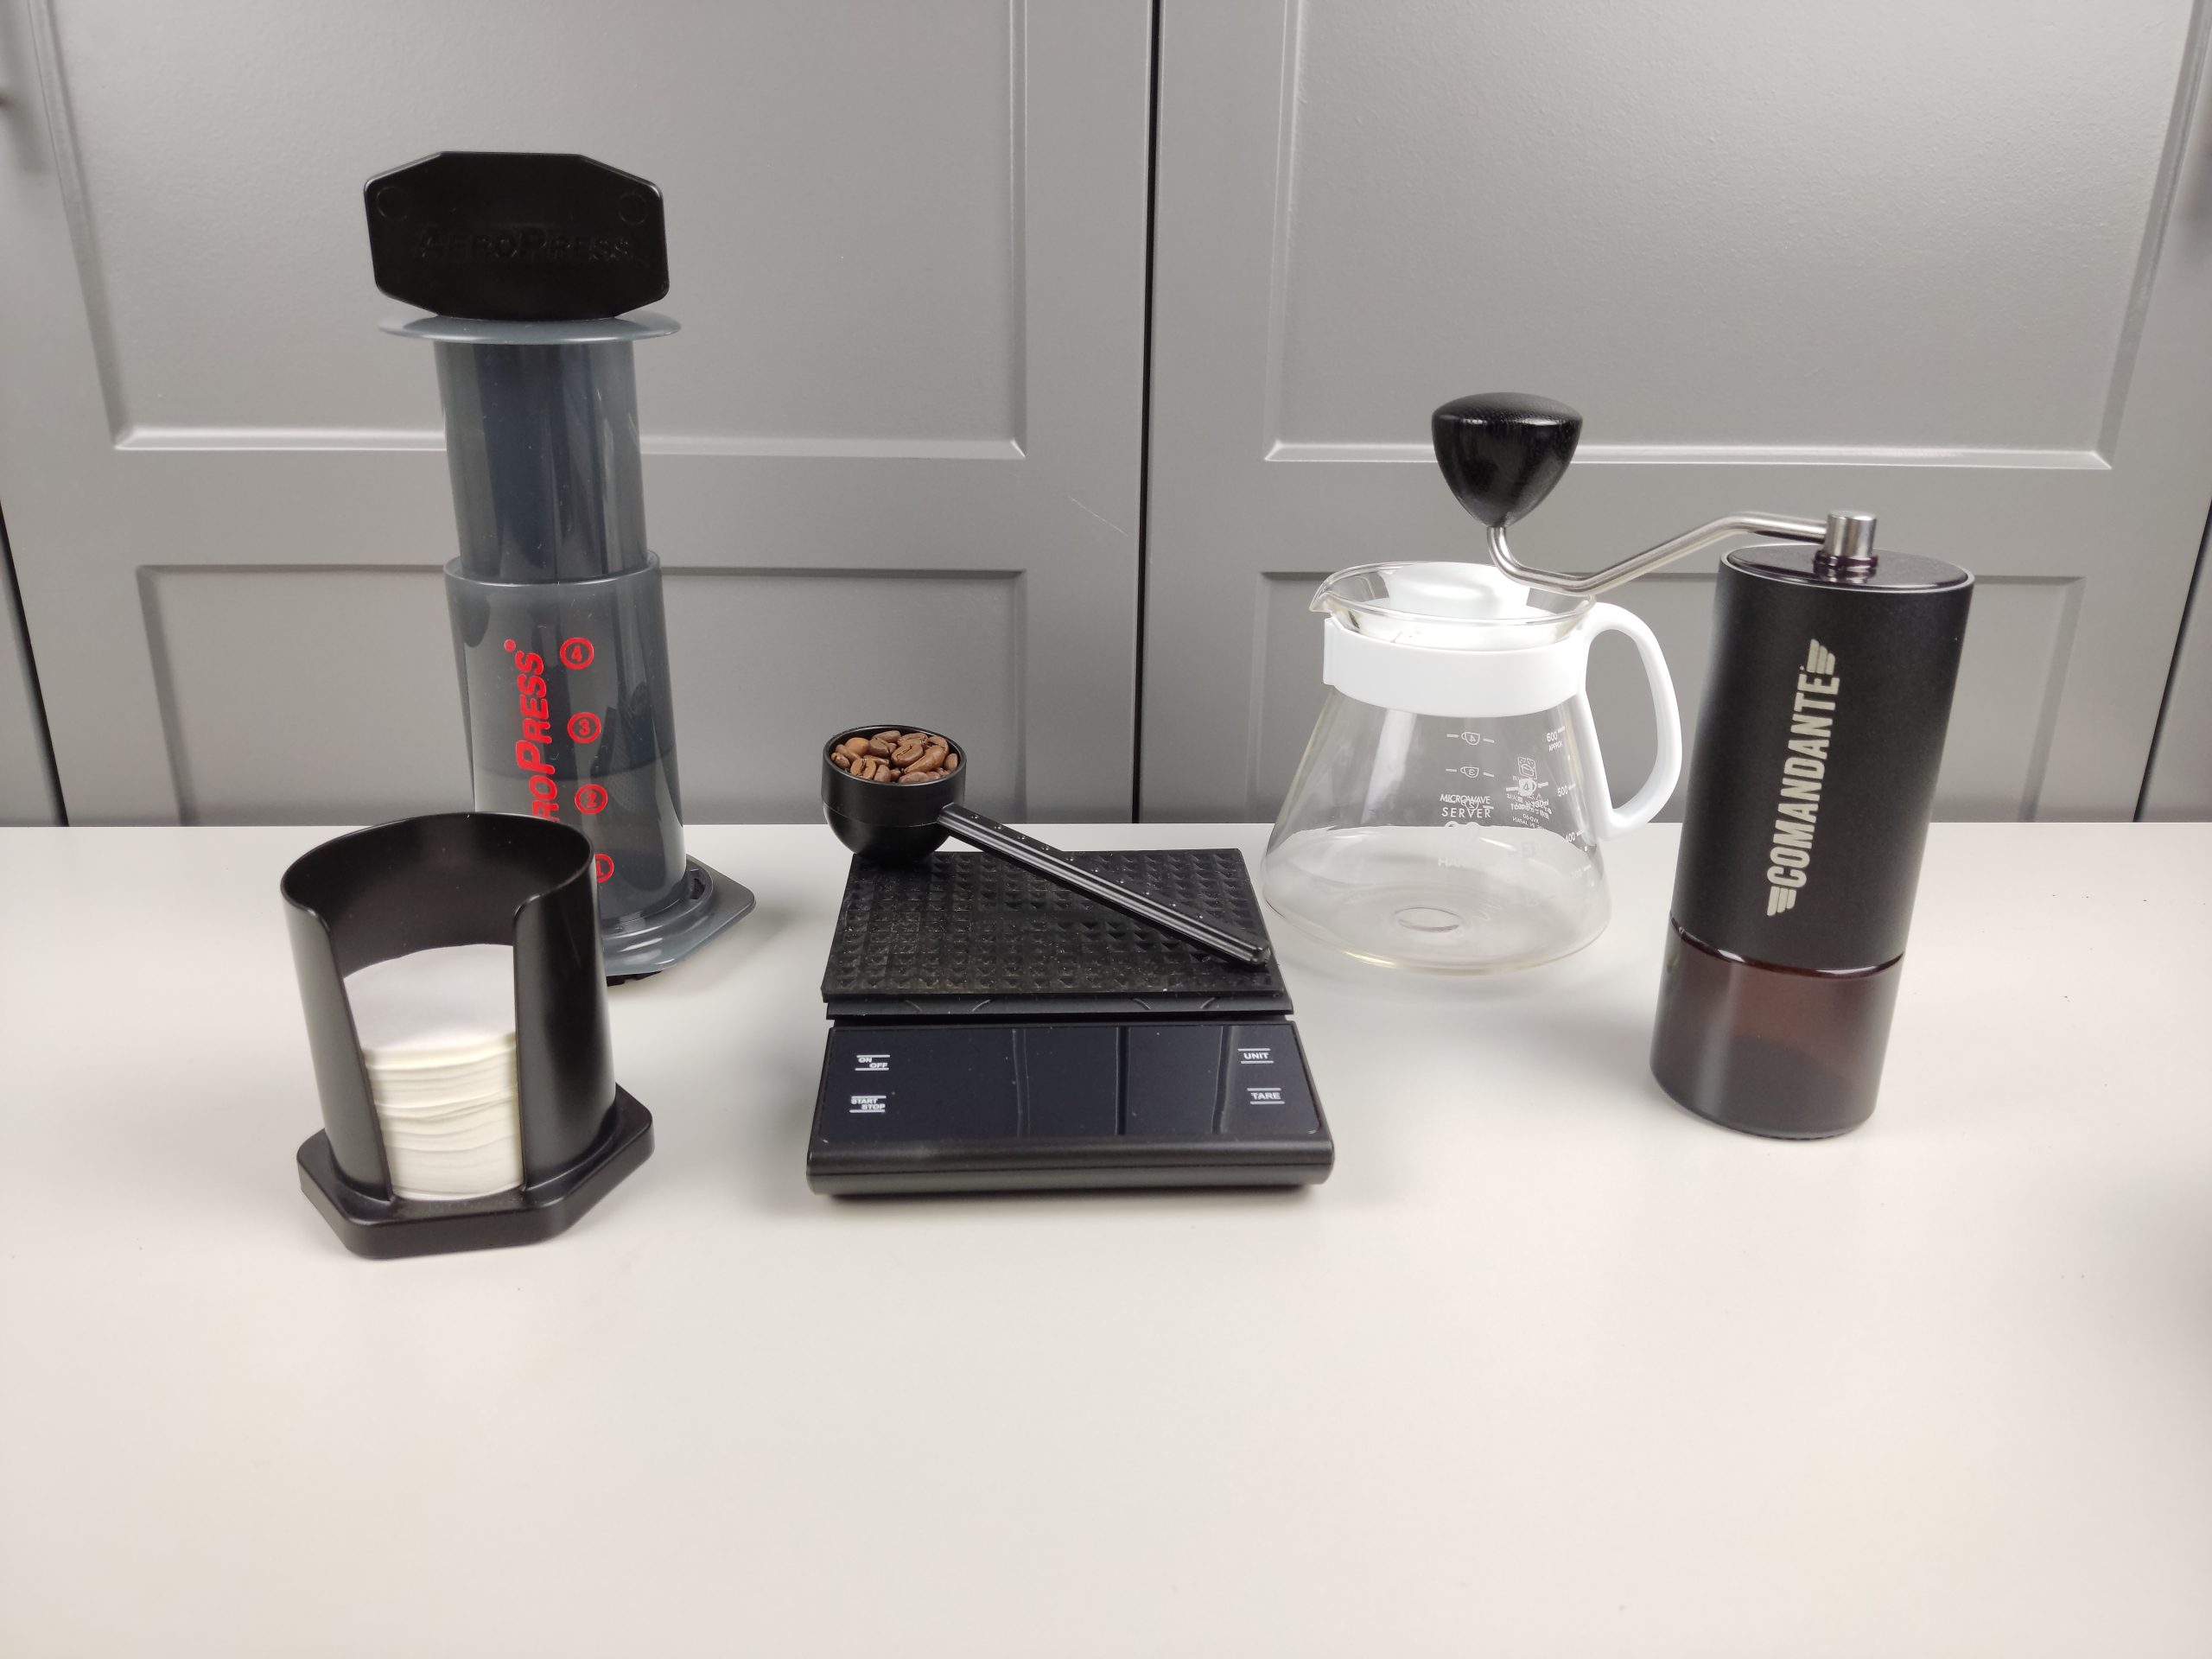
What You Need for Aeropress Cold Brew
- Aeropress coffee maker
- Aeropress paddle
- Coffee Beans
- Room temperature water
- Ice Cubes (for servings)
- Burr Grinder
- Mug or Decanter
- Scale (optional)
Step 1) Grind Your Coffee Beans
The coffee-to-water ratio often used for cold brew is 1:8. You should use 8 water units for every 1 unit of coffee grounds. This ratio makes a concentrated brew, so dilute it with water before drinking.
However, if you don’t want to add water later, you can directly brew your cold-brew coffee at a 1:16 coffee-to-water ratio. In this recipe, I used a 1:16 coffee-to-water ratio.
Weigh 15 grams of coffee beans and grind your coffee beans extra coarse. This grind size should be a bit coarser than you would use for a French press.
If you don’t have a scale, you can use the scoop that comes with your Aeropress. A full Aeropress scoop is approximately 15 grams of coffee beans.

Step 2) Add Coffee and Water
Place your Aeropress on the counter with the filter facing upwards. First, add your coffee grounds, then 240 ml (8 fl oz) of room temperature water to the filter of the Aeropress.
If you don’t have a scale, fill the Aeropress with water up to about 1 cm (½ inch) from the top.

Step 3) Stir and Wait
Stir the mixture with the paddle with your Aeropress until all the grounds are wet.
Next, place the paper filter in the filter cap of your Aeropress and mount it onto the chamber. Rinse the paper filter with water before attaching it to the filter cap to prevent it from falling off. This will make the paper filter stick to the filter cap.
Finally, wait for 12-24 hours for it to brew. You can leave your Aeropress on a corner of the counter during this time.
For a softer taste, brew for 12 hours; for a stronger taste, brew for close to 24 hours. If you are not sure where to start, 16 hours is a good starting point.


Step 4) Press The Plunger
Select a mug wide enough to fit the Aeropress filter cup and place it upside down on top of it. Then, holding the joint of the Aeropress with one hand and the mug with the other, turn them upside down together.
Next, push the plunger down with steady pressure without pushing too hard until you hear a hissing sound. The hissing sound indicates that all the water inside the Aeropress has been used up.


Step 5) Serve
Serve your coffee by adding as much ice as you like. You can add milk to soften the taste of your cold-brew coffee.

Fast Way To Make Cold Brew With Aeropress
If traditional cold brew is too strong for you or if you don’t have time for Aeropress cold brew, don’t worry. There is a quick way to prepare a cold brew with Aeropress.
What You Need for Quick Aeropress Cold Brew?
- Aeropress coffee maker
- Aeropress paddle
- Coffee Beans
- Room temperature water
- Burr Grinder
- Scale (optional)
Step 1) Grind Your Coffee Beans
Weigh 15 grams of coffee beans and grind your beans to a medium-fine consistency. This grind size is between what you would use for espresso and pour-over brewing.
If you don’t have a scale, you can use the scoop that comes with your Aeropress. A full scoop holds approximately 15 grams of beans.

Step 2) Add Coffee and Water
Place your Aeropress with the filter facing upwards on the counter. First, add your coffee grounds and 240 ml (8 fl oz) of room-temperature water.
If you don’t have a scale, fill the Aeropress with water up to about 1 cm (½ inch) from the top.

Step 3) Stir and Press
Stir the mixture with the paddle with your Aeropress continuously at medium speed for one minute.
Then, place the paper filter in the filter cap of your Aeropress and mount it onto the chamber. Rinse the paper filter with water before attaching it to the filter cap to prevent it from falling off. This will make the paper filter stick to the filter cap.
Transfer the coffee from the Aeropress into a mug.


Step 5) Serve
Serve your coffee by adding as much ice as you like. You can add milk to soften the taste of your cold-brew coffee.
Old School vs Quick Aeropress Cold Brew
Cold water needs more time than hot water to extract the flavors and aromas from coffee grounds. That’s why the brewing time for cold brew is quite long.
When I first heard that cold brew could be made with an Aeropress in just a few minutes, I honestly didn’t believe it. But after trying it, my opinion changed because the result was quite successful.
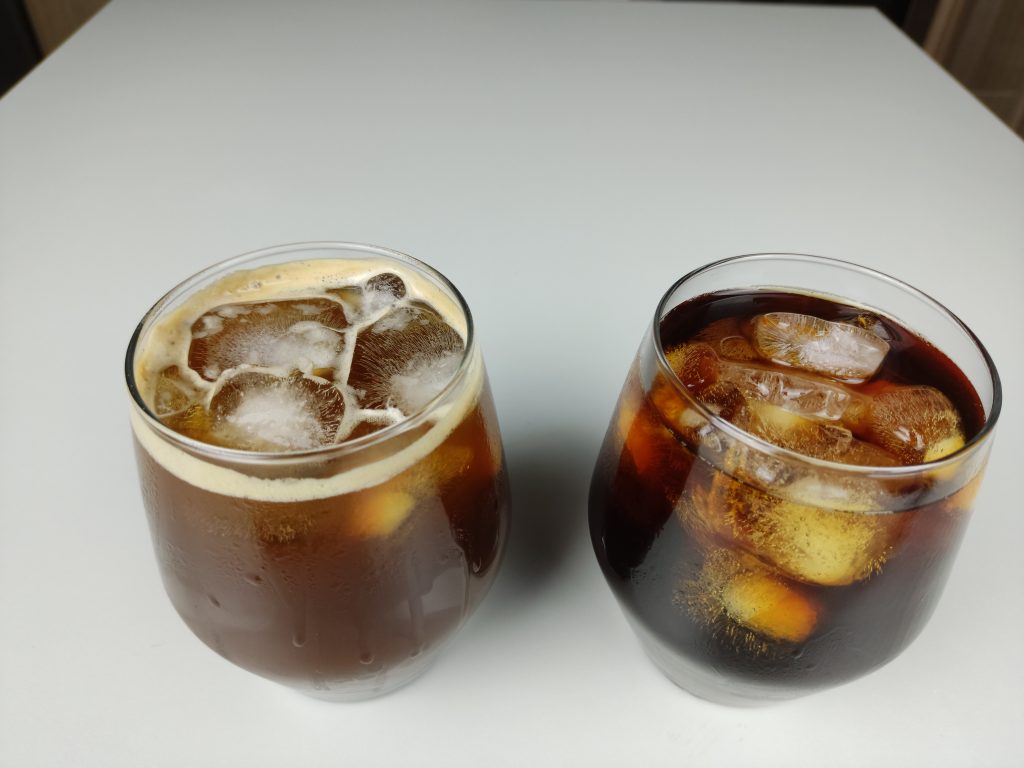
For instance, the cold brew I made quickly in the Aeropress was sweeter and less bitter. The traditional cold brew, on the other hand, was more aromatic and intense.
| Old School Cold Brew | Quick Aeropress Cold Brew | |
|---|---|---|
| Brewing Time | Very long (traditionally 12-24 hours) | Few minutes |
| Flavor Profile | More aromatic and intense | Sweeter and less bitter |
| Grind Size of Coffee Beans | Coarser grind | Finer grind |
| Extraction Goal | Slow extraction due to longer brewing time | Increased extraction due to finer grind size and shorter brewing time |
Summary for Aeropress Cold Brew
Which of these two Aeropress cold brew recipes you choose is entirely up to you. If you’re short on time or the traditional cold brew is too strong, the quick method will be a better alternative.
On the other hand, the quick method might feel a bit soft for those who like their coffee strong. If you ask me, you should try both and choose the one that suits your taste best.
I’m really curious about your opinion. What’s your side? Quick or old-school cold brew? Leave a comment.
Bonus: Is the cold brew made with the quick method too soft, or don’t you have time for the old-school method? No problem at all. Our Aeropress iced coffee article will solve all your problems.
Additionally, if you’re curious about the differences between cold brew and iced coffee, you can read our article on cold brew vs iced coffee.
Note: I must confess that sometimes I brew herbal teas in my Aeropress. If you’re interested in my special recipe for this, you can read my article on “Aeropress tea.”
Related Articles

Aeropress Cold Brew Recipe
Equipment
- 1 Aeropress paddle
- 1 Burr Grinder
- 1 Mug or Decanter
- 1 Scale (optional)
Ingredients
- 15 gr Coffee Beans
- 240 ml Water
- Ice Cubs
Instructions
- Grind Your Coffee BeansThe coffee-to-water ratio often used for cold brew is 1:8. You should use 8 water units for every 1 unit of coffee grounds. This ratio makes a concentrated brew, so dilute it with water before drinking.However, if you don’t want to add water later, you can directly brew your cold-brew coffee at a 1:16 coffee-to-water ratio. In this recipe, I used a 1:16 coffee-to-water ratio.Weigh 15 grams of coffee beans and grind your coffee beans extra coarse. This grind size should be a bit coarser than you would use for a French press.
- Add Coffee and WaterPlace your Aeropress on the counter with the filter facing upwards. First, add your coffee grounds, then 240 ml (8 fl oz) of room temperature water to the filter of the Aeropress.If you don’t have a scale, fill the Aeropress with water up to about 1 cm (½ inch) from the top.
- Stir and WaitStir the mixture with the paddle with your Aeropress until all the grounds are wet.Next, place the paper filter in the filter cap of your Aeropress and mount it onto the chamber. Rinse the paper filter with water before attaching it to the filter cap to prevent it from falling off. This will make the paper filter stick to the filter cap.Finally, wait for 12-24 hours for it to brew. You can leave your Aeropress on a corner of the counter during this time.For a softer taste, brew for 12 hours; for a stronger taste, brew for close to 24 hours. If you are not sure where to start, 16 hours is a good starting point.
- Press The PlungerSelect a mug wide enough to fit the Aeropress filter cup and place it upside down on top of it. Then, holding the joint of the Aeropress with one hand and the mug with the other, turn them upside down together.Next, push the plunger down with steady pressure without pushing too hard until you hear a hissing sound. The hissing sound indicates that all the water inside the Aeropress has been used up.
- ServeServe your coffee by adding as much ice as you like. You can add milk to soften the taste of your cold-brew coffee.